Easy Vegan Garlic Dough Balls Recipe
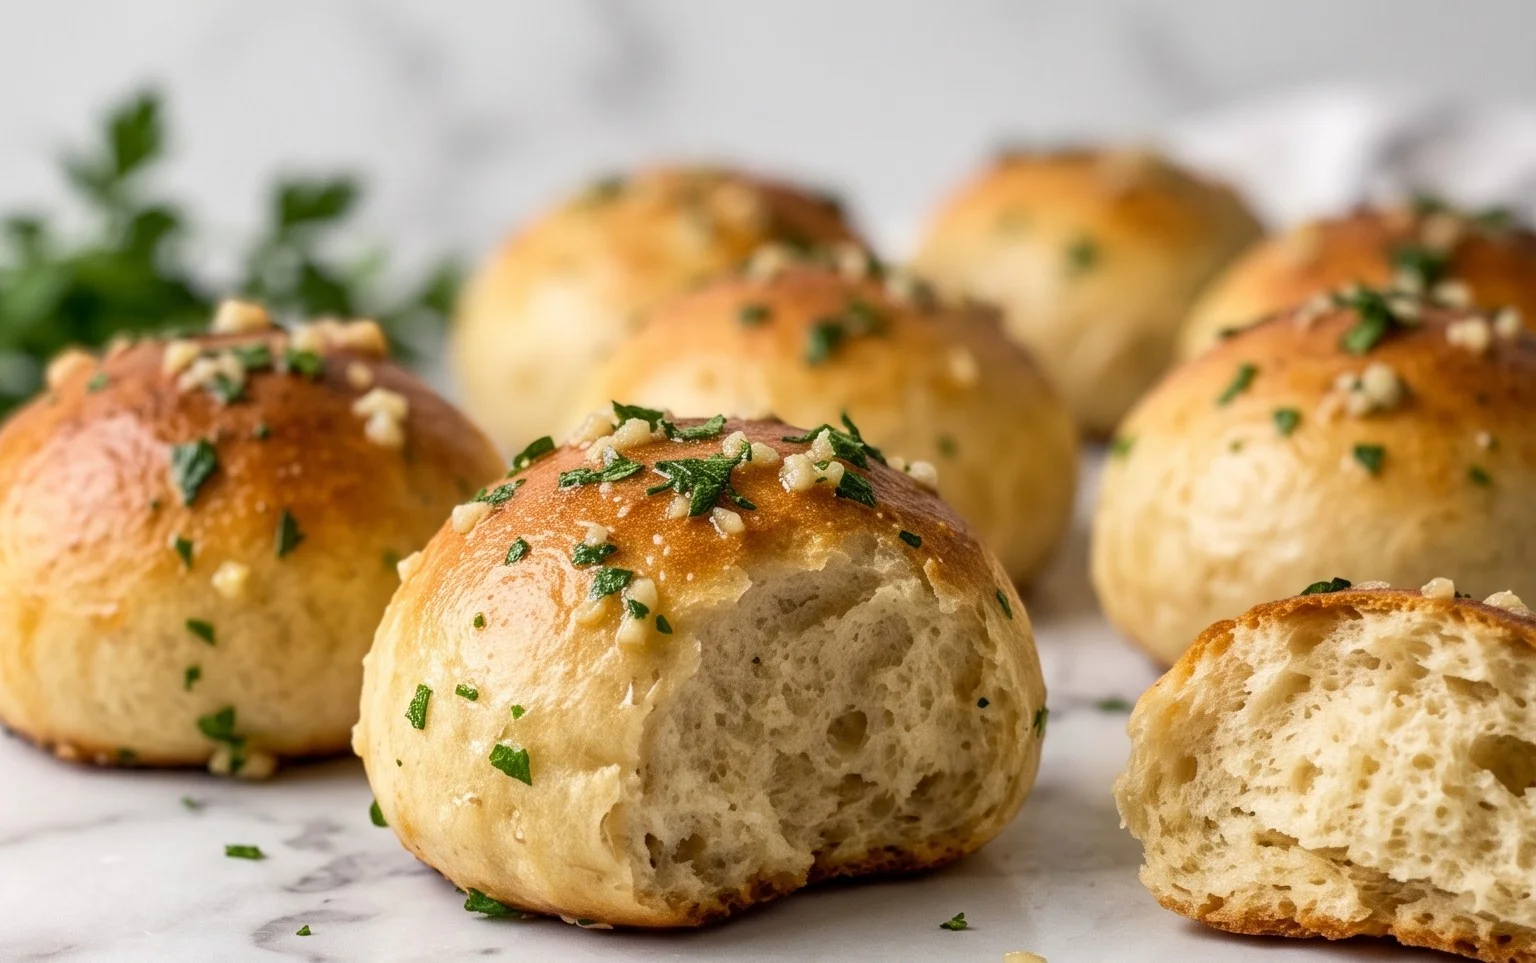
Vegan Garlic Dough Balls are soft, chewy little clouds of deliciousness, perfect for dipping into your favorite sauce or serving alongside a hearty stew. I first made these for a game night when I wanted something comforting and easy to share, and they were an instant hit. The magic really happens in the combination of simple pantry staples that transform into something special. The aroma alone, with roasted garlic and melted vegan butter, is enough to make your kitchen feel like a cozy Italian bakery. What makes these vegan garlic dough balls stand out is the incredibly tender crumb achieved without any dairy or eggs. We achieve this with a good quality bread flour and the right balance of liquids. They are surprisingly simple to whip up, making them ideal for beginners or anyone needing a quick, impressive appetizer. Get ready to impress yourself and your friends with these irresistible dough balls.
Ingredients:
- 500 g (4 cups) white bread flour
- 10 g (3 teaspoons) fast action (instant) yeast
- 1 teaspoon salt
- 1 teaspoon sugar
- 3 Tablespoons olive oil
- 160 ml (⅔ cup) unsweetened non-dairy milk (I use soy) (lukewarm)
- 160 ml (⅔ cup) water (lukewarm)
- 75 g (2 + ⅔ oz / ½ cup) raw cashews
- 2 cloves garlic (peeled )
- 1 ½ teaspoons tapioca starch
- ½ teaspoon salt
- 2 Tablespoons nutritional yeast
- 1 teaspoon cider vinegar
- 160 ml (⅔ cup) water
- 85 g (rounded ⅓ cup) vegan butter/spread
The Dough: Bringing it all Together
Making these dough balls starts with a simple yet effective yeast dough. You’ll want to make sure your non-dairy milk and water are lukewarm – not hot, not cold. This is key for activating the yeast. Too hot and you’ll kill it; too cold and it won’t wake up properly. I usually test it on my wrist, it should feel comfortably warm.
In a large bowl, combine the white bread flour, fast-action yeast, 1 teaspoon of salt, and 1 teaspoon of sugar. Give it a quick whisk to distribute the yeast and salt evenly. Pour in the lukewarm non-dairy milk and the lukewarm water. Add the 3 Tablespoons of olive oil.
Now, it’s time to bring it all together. You can do this by hand or with a stand mixer fitted with a dough hook. If you’re mixing by hand, use a wooden spoon or your hands to stir until a shaggy dough forms. Once it starts to come together, turn it out onto a lightly floured surface.
Knead the dough for about 8 to 10 minutes. You’re looking for a smooth, elastic texture. It should spring back when you gently poke it. If it feels too sticky, add a tiny bit more flour, just a teaspoon at a time. If it seems too dry, add a teaspoon of water. Over-kneading is difficult to do by hand, but with a mixer, be careful not to overwork it to the point where it breaks.
Once you’ve kneaded it to perfection, lightly grease a clean bowl with a little oil. Place the dough in the bowl, turning it to coat. Cover the bowl with a clean tea towel or plastic wrap. Let it rise in a warm place for about 1 to 1.5 hours, or until it has doubled in size. This is called the first proof. A good warm spot can be an oven with just the light on, or near a sunny window.
The Garlic “Cheese” Filling: A Creamy Dream
While the dough is rising, we’ll prepare the irresistible garlic filling. This is where the magic happens to create that gooey, cheesy center without any dairy.
First, soak the raw cashews. Place the 75g of raw cashews in a bowl and cover them with boiling water. Let them soak for at least 15-20 minutes. This softens them significantly, making them easier to blend into a smooth cream. If you have more time, you can soak them in cold water for a few hours or overnight in the fridge. Draining them well after soaking is important.
In a blender or food processor, combine the soaked and drained cashews, the 2 peeled garlic cloves, 1 ½ teaspoons of tapioca starch, ½ teaspoon of salt, 2 Tablespoons of nutritional yeast, and 1 teaspoon of cider vinegar. Pour in the 160 ml of water.
Blend on high speed until the mixture is completely smooth and creamy. You want a consistency similar to a thick pesto or a very smooth hummus. Scrape down the sides of the blender as needed. If it’s too thick to blend, add another tablespoon of water at a time. The nutritional yeast adds a cheesy, savory flavor, and the cider vinegar gives it a slight tang, mimicking the effect of cheese. The tapioca starch helps to thicken it slightly when baked.
Shaping and Second Rise: Ready for Baking
Once your dough has doubled in size, gently punch it down to release the air. Turn the dough out onto a lightly floured surface. Divide the dough into about 12-16 equal pieces, depending on how big you want your dough balls. Roll each piece into a smooth ball.
Now, it’s time to fill them. Take one dough ball and flatten it slightly in your palm. Place a teaspoon or so of the garlic cashew filling into the center. Carefully bring the edges of the dough up and over the filling, pinching them together to seal completely. Ensure there are no gaps where the filling can escape. Roll the sealed ball gently between your hands to smooth it out.
Place the filled dough balls on a baking sheet lined with parchment paper. Make sure to leave a little space between them as they will expand during their second rise and baking.
Cover the shaped dough balls again with the tea towel and let them rest for another 30-45 minutes. This is their second rise, allowing them to get puffy and light before baking. They should look noticeably fuller and softer.
Baking and Finishing Touches: Golden Brown Goodness
Preheat your oven to 200°C (400°F).
While the dough balls are having their second rise, melt the 85g of vegan butter/spread in a small saucepan or in the microwave.
Once the dough balls have had their second rise, they are ready for baking. Bake them for 15-20 minutes, or until they are golden brown on top and sound hollow when tapped. The baking time can vary depending on your oven, so keep an eye on them towards the end.
As soon as the dough balls come out of the oven, brush them generously with the melted vegan butter. This gives them a beautiful sheen and adds extra richness and flavor. You can also sprinkle them with a little extra sea salt or some dried herbs like parsley or chives if you like.
These vegan garlic dough balls are best served warm, straight from the oven. They are perfect as a snack, an appetizer, or alongside your favorite soup or salad. Enjoy that soft, pillowy bread with the delicious, creamy garlic filling!
Conclusion:
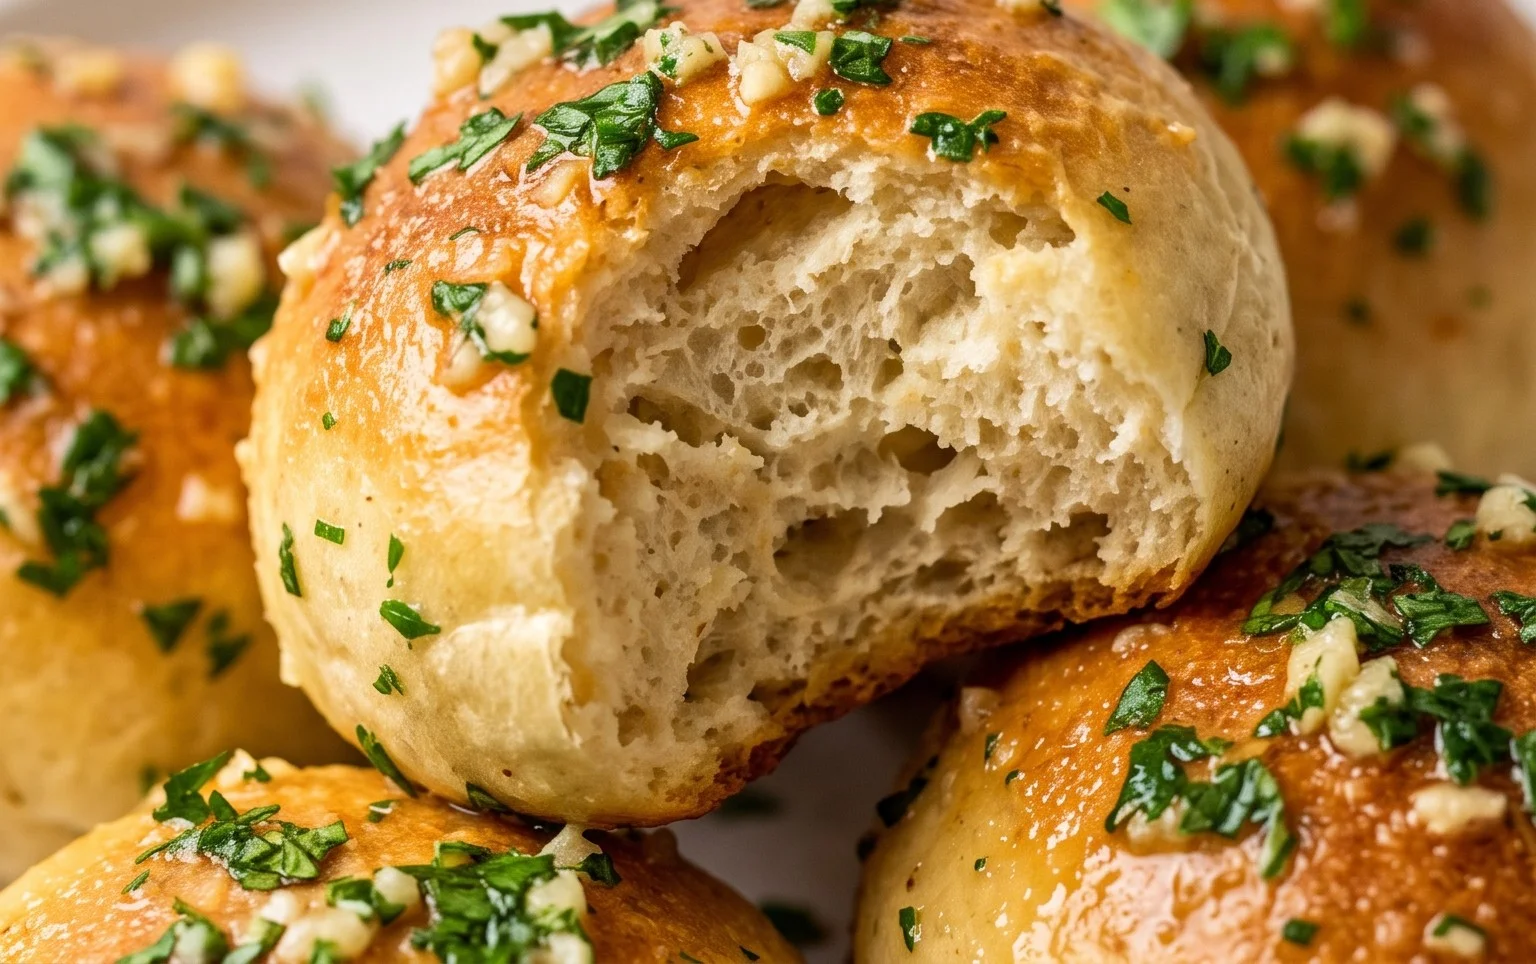
These Vegan Garlic Dough Balls are a testament to how delicious plant-based baking can be. They are wonderfully soft, packed with garlicky goodness, and incredibly satisfying, whether you’re scooping up a rich sauce or just enjoying them plain. I often make a double batch because they disappear so quickly, and they reheat beautifully. For serving, think about pairing them with a marinara sauce for dipping, a creamy vegan cheese sauce, or even a simple herb-infused olive oil. If you’re feeling adventurous, try adding some finely chopped fresh rosemary or chives into the dough before baking for an extra layer of flavor. They truly are a fantastic addition to any meal or gathering. I hope you give these vegan garlic dough balls a try and find them as enjoyable to make as they are to eat. Don’t be afraid to experiment with different seasonings!
FAQ:
Can I make the dough ahead of time?
Yes, you can prepare the dough and let it rise in the refrigerator for up to 24 hours. This slow fermentation can actually develop more flavor. Just bring it to room temperature for about an hour before shaping.
What if I don’t have bread flour?
All-purpose flour can work in a pinch, but the texture won’t be quite as chewy and structured. You might need to adjust the liquid slightly, as all-purpose flour can absorb more or less moisture.
How should I store leftovers?
Store any leftover dough balls in an airtight container at room temperature for up to 2 days, or in the refrigerator for up to 4 days. Reheat them gently in a low oven or a toaster oven to refresh their texture.
Vegan Garlic Dough Balls
Delicious and savory vegan dough balls infused with garlic and a creamy cashew dip.
Ingredients
-
500 g white bread flour
-
10 g fast action yeast
-
1 teaspoon salt
-
1 teaspoon sugar
-
3 Tablespoons olive oil
-
160 ml unsweetened non-dairy milk (lukewarm)
-
160 ml water (lukewarm)
-
75 g raw cashews
-
2 cloves garlic
-
1 ½ teaspoons tapioca starch
-
½ teaspoon salt
-
2 Tablespoons nutritional yeast
-
1 teaspoon cider vinegar
-
160 ml water
-
85 g vegan butter/spread
Instructions
-
Step 1
In a large bowl, combine the white bread flour, fast action yeast, 1 teaspoon salt, and 1 teaspoon sugar. Mix well. -
Step 2
Add the olive oil, lukewarm non-dairy milk, and lukewarm water to the dry ingredients. Mix until a shaggy dough forms, then knead on a lightly floured surface for 8-10 minutes until smooth and elastic. -
Step 3
Place the dough in a lightly oiled bowl, cover, and let it rise in a warm place for 1 hour, or until doubled in size. -
Step 4
While the dough rises, prepare the cashew dip. Soak the raw cashews in boiling water for 15 minutes, then drain. Blend the soaked cashews, peeled garlic cloves, tapioca starch, ½ teaspoon salt, nutritional yeast, cider vinegar, and 160 ml water until smooth and creamy. Set aside. -
Step 5
Once the dough has risen, punch it down and divide it into 12 equal portions. Roll each portion into a ball. -
Step 6
Place the dough balls onto a baking sheet lined with parchment paper. Cover and let them rest for another 15-20 minutes. -
Step 7
Preheat your oven to 200°C (400°F). Bake the dough balls for 18-20 minutes, or until golden brown. -
Step 8
While the dough balls are baking, melt the vegan butter/spread in a small saucepan. Stir in the minced garlic (optional, for extra garlic flavor) and a pinch of salt. -
Step 9
Once the dough balls are baked, brush them with the melted garlic butter. Serve immediately with the cashew dip.
Important Information
Nutrition Facts (Per Serving)
It is important to consider this information as approximate and not to use it as definitive health advice.
Allergy Information
Please check ingredients for potential allergens and consult a health professional if in doubt.